Welcome to the Veekay International ! Today, we're diving into the wonderful world of leather cords – a versatile and stylish material perfect for creating unique bracelets and necklaces. Whether you're a seasoned crafter or just starting, this tutorial will guide you through the basics of designing and assembling your own beautiful jewelry pieces.
Leather cords come in a variety of styles, thicknesses, and colors, offering endless possibilities for your creative projects. From rustic and natural to sleek and modern, there's a leather cord for every aesthetic.
Why Choose Leather Cords?
- Durability: Leather is known for its strength and longevity, making it an excellent choice for everyday wear.
- Versatility: It pairs well with a wide range of beads, charms, and findings.
- Comfort: Leather is soft and comfortable against the skin, conforming to your wrist or neck over time.
- Style: It adds a touch of organic elegance or rugged charm to any piece.
Getting Started: Essential Tools and Materials
Before we begin, let's gather what you'll need. Don't worry, most of these are easily found at craft stores or online!
- Leather Cords: Choose your preferred color and thickness. For beginners, a 1.5mm or 2mm round leather cord is a great starting point. Veekay International offers a fantastic selection!
- Clasps: Magnetic clasps, lobster clasps, or toggle clasps – select what you like best.
- End Caps: These are essential for finishing the ends of your cords and attaching the clasp.
- Jump Rings: Small metal rings used to connect components.
- Pliers: Round-nose pliers and flat-nose pliers are incredibly helpful for opening and closing jump rings.
- Strong Adhesive: E6000 or a similar jewelry adhesive works well for securing cords into end caps.
- Scissors or Craft Knife: For cutting your leather cord cleanly.
- Ruler or Measuring Tape: To ensure accurate lengths.

Project 1: Simple Leather Cord Bracelet
This is a fantastic project for beginners, focusing on getting comfortable with cutting, gluing, and attaching clasps.
Step-by-Step Guide:
- Measure and Cut Your Cord: Wrap the leather cord around your wrist to determine the desired length. Remember to account for the clasp, which will add a little extra length. A good rule of thumb is to measure your wrist and then subtract about 1 to 1.5 inches, depending on the size of your chosen clasp. Cut the cord cleanly with scissors or a craft knife.
- Prepare the End Caps: Apply a small amount of strong adhesive inside one of your end caps. Make sure it's enough to coat the inside walls but not so much that it oozes out excessively.

- Insert the Cord: Immediately insert one end of your cut leather cord into the end cap, twisting it slightly to ensure the glue coats the cord evenly. Hold it firmly for a few seconds.

- Repeat for the Other End: Once the first end cap is secure (check your adhesive's drying time, usually a few minutes for initial hold), repeat steps 2 and 3 for the other end of the leather cord.
- Attach the Clasp: Use your pliers to open a jump ring. Thread one part of your clasp (e.g., one side of a magnetic clasp) onto the jump ring, then attach the jump ring to the loop of your end cap. Close the jump ring securely.

- Complete the Clasp: Repeat step 5 for the other side of your clasp and the other end cap. Make sure both parts of your clasp are facing the correct way to connect properly.

Video placeholder for "How to make a Simple Leather Bracelet" (approx. 1-2 minutes, showing the steps above)*
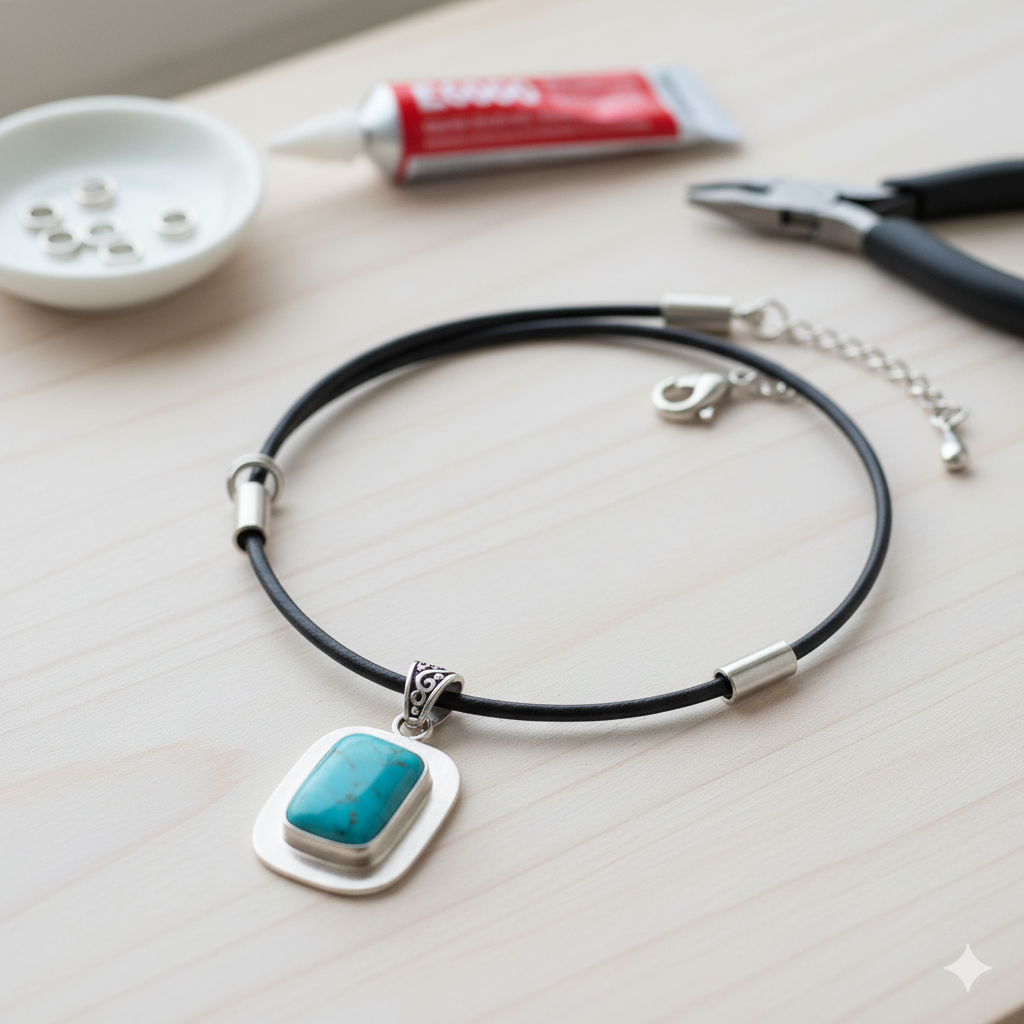
Project 2: Leather Cord Necklace with a Pendant
Now that you've mastered a basic bracelet, let's make a simple necklace! This project is very similar but incorporates a pendant for added flair.
Step-by-Step Guide:
- Measure and Cut Your Cord: For a necklace, common lengths range from 16 to 24 inches. Measure a piece of cord to your desired length, again remembering to factor in the clasp. Cut cleanly.
- Add Your Pendant (Optional): If your pendant has a bail (a loop) large enough for the cord to pass through, thread it onto the cord now before attaching end caps. If it needs a jump ring, attach it to the cord with a jump ring.
- Attach End Caps: Just like with the bracelet, apply glue inside an end cap and insert one end of the leather cord. Hold firmly until secure. Repeat for the other end.
- Attach the Clasp: Use jump rings to attach your chosen clasp (e.g., a lobster clasp with an extender chain) to both end caps. Ensure all jump rings are securely closed.
